

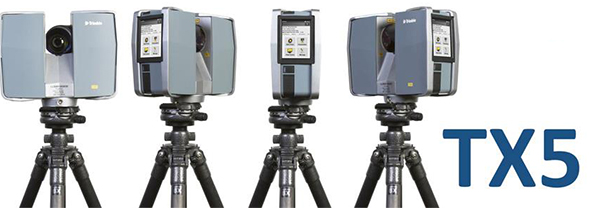
LiDAR devices include a variety of different types of 3D scanning equipment but all can be defined by one feature they, “measure the physical world using lasers, lights or x-rays and generate dense point clouds or polygon meshes” (http://www.rapidform.com/3d-scanners/ accessed Sept. 25, 2014) In order to be integrated easily into the cultural resource management world a LiDAR (or 3D scanner) needs to do three essential functions: be incredibly mobile, have an easy to use software and be durable enough to use in the field. Two options for devices that are mobile and rugged enough to be used in the field are: the Trimble TX5 and the FARO Focus3D X330. Both of these models offer key features for use in the archaeology field, including a small size, a lightweight and rugged exterior protection, fully integrated touch screen displays (meaning no additional cost for an external data collector would be accrued), scanning ranges of over 100m, an integrated GPS and built in color cameras. Both models also have removable SD cards making scans flow seamlessly from field to office and an overabundance of sunlight has very little effect on the quality of scans (making it capable of fully outdoor scans). Both also have fully integrated software options that are essential to making an easy work flow from office to field scans and back to office.
This ease of workflow revolves around two essential features: easy to use software and touch screen compatibility in the field. Both Trimble and FARO have software options that seem essential to getting started easily and quickly using the 3D scanning equipment. These software options allow you to plan ahead in the office and construct project folders with individual folders to divide up different scanning areas. This works best if the scanning area can be assessed before the actual scan and then the scans can be already organized before the scanner even goes into the field. Once in the field, these project folders can be filled with the correct placement scans making it incredibly easy to work through this data once it is uploaded from the scanner. The scanners both use removable SD cards to store data that can be programmed by the software to hold preset folders and pre-determined settings. The settings that must be worried about in the field (or before field scanning) are those that affect the resolution and quality. These are pretty easy settings to worry about and include programming the scanner to adjust for lighting, scan quality vs. time of scan and photo resolution. The touch screen data collector on the scanner makes adjusting these qualities relatively simple and easy to use. Both 3D scanners have external battery packs that can last up to 5 hours in the field and can be charged while simultaneously using the machine.
One of the more difficult aspects of 3D scanning is ensuring enough reference points are collected in each scan so the scans can be matched up to create a full 3D picture post field scanning. This includes making sure each scan has reference points like the accompanying glass globes or some other recognizable feature that can be easily seen and matched after the scans are complete. This seems like it would be the biggest hindrance to workflow and steepest part of the learning curve for 3D scanning in archaeology. If done properly and efficiently, matching these points of reference would be very easy in the accompanying software but if not it could cause mismatched points or a lot of confusion leaving gaps in the full scans. It requires a fair amount of spatial analysis to see where these points would best match up in the software, but is not an essential feature of creating a good scan. As long as all sides of the feature are scanned, a lot of work can be done on the software end to match up points and integrate the scans into a full 3D model. There are ways this can be done efficiently, but a fair 3D scan could also be acquired and worked on even if the scan was taken by an archaeologist not fully trained in taking scans or integrating them into the software. The easy to use functions on the actual scanner (and how they are linked to the software) makes taking scans relatively accessible to anyone (even the most technologically deficient archaeologists). Another aspect of setting up the scanner in the field is making sure the tripod height can incorporate all aspects of the feature to be scanned. This can be done in the field and once the scan is going the machine automatically does three things: takes the laser scan rotating 180 degrees around, goes back and integrates color photos to the scan, and automatically calibrates the scan and the photo. Once the machine has scanned an area, it is saved to the SD card in the file folder already chosen and can easily be moved to the next scanning area.
Once the scans are taken, the SD card can be removed from the scanner and sent to the office for post-field analysis. This includes uploading all the scans into software compatible with the machines and using the associated software to integrate the scans into a single 3D scan. Both software associated with the different models are incredibly simple to use and feature automatic scan integration functions. This means the software will go through all of the scans and match the points of reference (ex: the glass globes) and overlay the individual scans to make the 3D view. According to the software description it, “processes and manages scanned data efficiently and easily by using automatic object recognition and scan registration and positioning... it can also colorise scans” (http://www.faro.com/en-us/products/3d-surveying/faro-focus3d/overview#main). This can also be done manually or a combination of both manually and automatically. Once completed the scans can be exported as a point cloud as an end result or to be used in another software like AutoCAD for more modeling features. The way the scanner is designed and integrated with the software makes the entire process of 3D scanning incredibly simple, once the steep learning curve is overcome.
Although steep, the learning curve of using and integrating LiDAR or 3D scanning into a cultural resource management setting is easily managed by a firm willing to invest in this highly accurate, competitive technology. The biggest prohibitive factor in integrating this technology into CRM is unfortunately, the cost.
3D SCANNING TUTORIALS
Check out this series of video tutorials from Leica, it offers a phenomenal overview to the practicalities of 3D scanning.
ADDITIONAL LINKS
FARO
Step by step video documenting how to take a scan on FARO 3D and integrate the scans into associated software. https://www.youtube.com/watch?v=Dv5YgZ06nn4
FARO Laser Scanner Focus 3D X Series. http://www.faro.com/en-us/products/3d-surveying/faro-focus3d/overview#main
FARO software overview and description http://www.faro.com/en-us/products/faro-software/scene/features#main
Video documenting key features of FARO Laser Scanner Focus 3D X330. https://www.youtube.com/watch?v=a9oJ8BOAnh4&feature=youtu.be
Video documenting other uses of FARO equipment and pricing. http://www.youtube.com/watch?v=5NTOXI7kH0o
Trimble
Trimble link to 3D laser scanning devices. http://www.trimble.com/3d-laser-scanning/tx5.aspx?dtID=overview
Trimble User Guide TX5 3D scanner. http://trl.trimble.com/docushare/dsweb/Get/Document-633127/Trimble%20TX5%20%20User%20Guide%20V2%20-%20English.pdf
